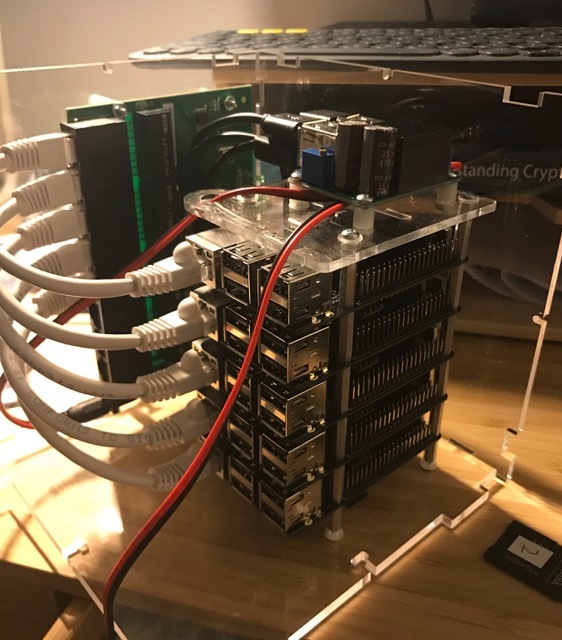
Picocluster, is a company selling tiny ARM clusters. Recently I bought a picocluster advanced cluster kit for some distributed computing experiments.
There a several different options for the clusters. I chose to go with Odroid C2’s over the standard Raspberry Pi’s because they have twice the RAM which is important for playing with Spark and Hadoop, and also Gigabit ethernet instead of the Pi’s USB/ethernet bottleneck. There a several different size options available. I chose to go with a 5 node cluster as it came with a switch and seems “more serious” than the 3, while the 10 node cluster seemed like overkill.

Setup
For the base operating system I discarded the default images and went with Arch Linux ARM. This was because the base image provided came with Ubuntu, X.org, and MATE, and felt too heavy. I followed the instructions for preparing the image but made sure to give static ip addresses for each node by editing the default eth0.network. The details here depend on how your router is setup with mine using the 192.168.0.0/24 range.
[alarm@pc1 ~]$ cat /etc/systemd/network/eth0.network
[Match]
Name=eth0

[Network]
Address=192.168.0.51/24
Gateway=192.168.0.1
DNS=8.8.8.8
After booting I also configured hostnames, setup sudo, and ssh keys on all the nodes.
Docker Swarm
My next goal was to install docker swarm on the cluster, which allows docker containers to be deployed and load balanced across a distributed set of nodes.
I installed docker on the master node and wrote simple scripts like below to install on every node.
for server in pc2 pc3 pc4 pc5
do
  ssh alarm@$server "sudo pacman -S --noconfirm docker && \
                     sudo systemctl enable docker && \
                     sudo systemctl start docker && \
                     sudo gpasswd -a alarm docker"
done
Note that with recent versions of docker like the one provided by Arch, you don’t need to install docker swarm separately.
Next I created a swarm on my master node pc1:
docker swarm init --advertise-addr 192.168.0.51
And then let the other nodes join the swarm through the provided docker join command. Running docker node ls will let you see an overview of the swarm.
[alarm@pc1 ~]$ docker node ls
ID                           HOSTNAME  STATUS  AVAILABILITY  MANAGER STATUS
6uyle1yyfxit9osy65ql2xygl    pc5       Ready   Active
6xjfh3zz3c6jj7p0k5eda5zjw    pc4       Ready   Active
6y5v4c884oqysheylmvo38hib    pc3       Ready   Active
7r7w0415gbb7diac2p0033khj *  pc1       Ready   Active        Leader
d7nzoim2sl1w9r57eudktt7fu    pc2       Ready   Active
Because the servers have an ARM architecture, they will by default not run standard Docker images. There is a good list of some ARM centric docker images provided by Hypricot and also good information on their blog. As a simple example, the below runs a whoami service provided by port 80 on all ports.
docker service create --name whoami -p 80:8000 hypriot/rpi-whoami
We can see this service running on pc2.
[alarm@pc1 ~]$ docker service ps whoami
ID                         NAME      IMAGE               NODE  DESIRED STATE  CURRENT STATE          ERROR
ejpbii0nafnvhv7rlhas429uj  whoami.1  hypriot/rpi-whoami  pc2   Running        Running 4 minutes ago
Now let’s scale this to 5 replicas.
docker service scale whoami=5
[alarm@pc1 ~]$ docker service ps whoami
ID                         NAME      IMAGE               NODE  DESIRED STATE  CURRENT STATE          ERROR
ejpbii0nafnvhv7rlhas429uj  whoami.1  hypriot/rpi-whoami  pc2   Running        Running 6 minutes ago
6ew13jqrn9cg7i2mwieuw36zv  whoami.2  hypriot/rpi-whoami  pc3   Running        Running 1 seconds ago
9tnt9bdxsj8r42t3b142xqwg5  whoami.3  hypriot/rpi-whoami  pc4   Running        Running 2 seconds ago
etcnr55gum1b19lcx0sq812tf  whoami.4  hypriot/rpi-whoami  pc1   Running        Running 2 seconds ago
0mtx4hzb6sjp3yc07otomgko1  whoami.5  hypriot/rpi-whoami  pc5   Running        Running 2 seconds ago
You can see the service running by running curl -4 http://pcX on any of the nodes.
For more information check out the Docker Swarm docs.